
Looking to create a newsletter but don’t know where to start? With the right tools, you can take your email marketing strategy to the next level without spending a dime.
Newsletters are an essential part of any effective email marketing strategy. Nearly any type of business can benefit from knowing how to create a newsletter. Whether you’re a small business, ecommerce giant, or anything in between, email newsletters can help build lasting relationships with your clients.
The best part? Creating your email newsletter can be completely free!
To help you get started, this article covers everything you need to know on how to create your own newsletter:
- Prepare the newsletter strategy
- Choose a newsletter software
- Set up your newsletter email list
- Create a newsletter subscription form
- Attract newsletter subscribers
- Create your newsletter campaign with Brevo
- Preview and send a test newsletter
- Send your newsletter
- Track newsletter performance
1. Prepare your email newsletter strategy
Define your email newsletter objectives
Before setting out to create a newsletter, you should define your objectives. Successful newsletters are goal-oriented, audience-specific, and support a larger marketing strategy.
For this reason, the first step to creating a newsletter is planning. Ask yourself these questions:
- Who is my target audience and what are their needs?
- What are the goals of my newsletter? (Generate web traffic, increase sales, build better customer relationships, create a loyal following for your content, etc.)
- What type of content am I sending my subscribers? (Exclusive offers, new blog articles, promotional content, company updates, etc.)
- How frequently will I send my newsletters?
- What do my subscribers get from my newsletters? What is my value proposition?
Decide how your newsletter will add value
One of your top priorities in creating a newsletter should be providing real value to your subscribers. If your campaigns offer nothing but promotional content, your open rates and click-through rates will suffer.
You can add value to your newsletters by:
- Providing personalized offers and discounts via email automation
- Signaling to helpful content on your website (new blog posts, how-to guides, etc.)
- Linking to gated content (ebooks, training materials, tools or templates, etc.)
At the same time, sending at regular intervals and honing your brand’s image, voice, and tone helps your newsletters come across as reliable and trustworthy. In turn, this gets your subscribers in the habit of receiving genuinely valuable content from your business.
2. Choose a newsletter software
You may be asking, “Do I really need a newsletter software?”
In short, yes.
Creating a newsletter is definitely simple, but making sure it gets delivered is another story. If you tried sending a campaign to even just a few hundred contacts in Gmail or Outlook, it’s unlikely to ever reach your subscribers’ inboxes. For this reason, having a dedicated email marketing platform is essential.
Why?
Email deliverability depends on a few factors. Your reputation as a sender, the newsletter content, and technical aspects like domain and IP signatures all impact whether your email arrives in inboxes. Without taking these things into account, your campaigns will likely be flagged as spam.
This is where email marketing software comes in. Having a dedicated newsletter software helps increase deliverability and manages the more technical aspects of email marketing for you. An email marketing software should:
- Serve as your email service provider (ESP). While ISPs like Gmail and Outlook do the job for individuals, they don’t have the capacity or level of authentication to ensure newsletter deliverability
- Provide analytics on your campaign, including open rates, click through rates, and bounce rates
- Help you comply with GDPR standards
- Allow you to easily create attractive and engaging campaigns
Brevo’s free drag-and-drop editor lets you create custom, professional newsletters quickly and easily. A free account includes access to dozens of newsletter templates as well as features like contact management, marketing automation, and transactional emails/SMS.
To make the most of this guide, create your free Brevo account now and follow along step-by-step to create your own newsletter:
3. Set up your newsletter email lists
The next step to sending newsletters is creating an email list. Your email list is basically your audience. But there are a few things to keep in mind to make sure your campaigns have the greatest possible reach.
First, your email list should be 100% opt-in. This means the people receiving your email need to have given their consent (usually through a signup form). This practice not only helps with email deliverability, but is also required under GDPR.
Second, you should never buy an email list. Doing so lessens your authority as a sender and will result in low deliverability rates. Double opt-in signups are a much more effective and responsible email list-building strategy.
Third, don’t forget about email list cleaning. Luckily, most email marketing software does this for you. Instead of manually keeping track of unengaged contacts, entering this data in your contact management tool, and segmenting your list, solutions like Brevo handle all of this for you.
Next, we’ll show you how to set up your email list on Brevo.
Import existing contacts
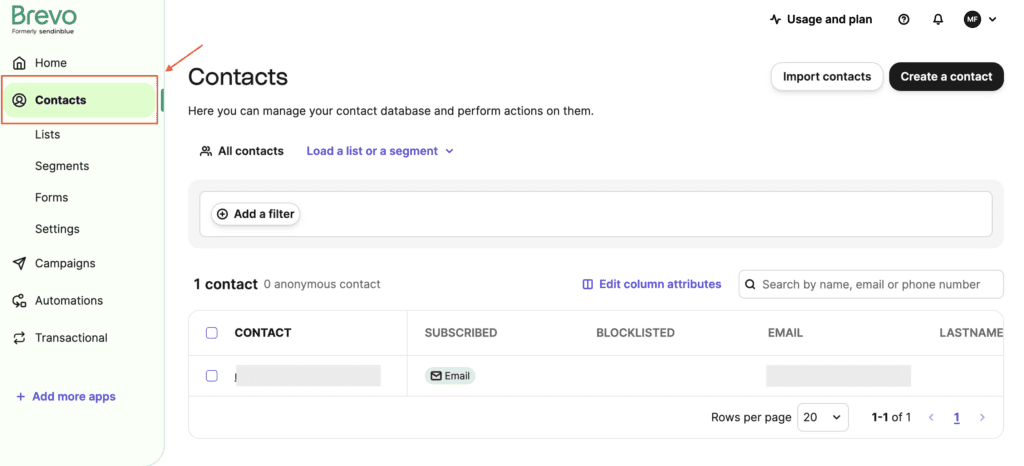
Importing existing contacts to your Brevo account is easy. Start by clicking “contacts” on the green, left dashboard.
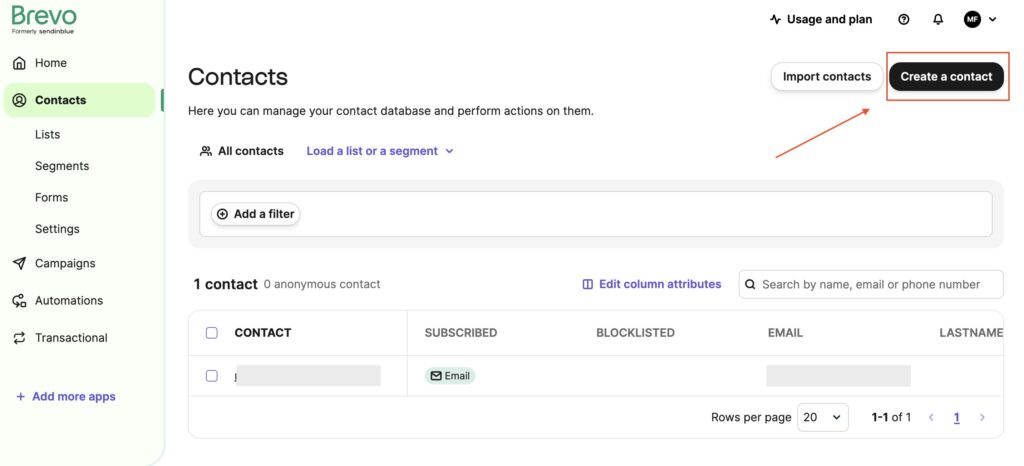
To manually enter contact information, just click on “Create a contact” in the top right-hand corner.
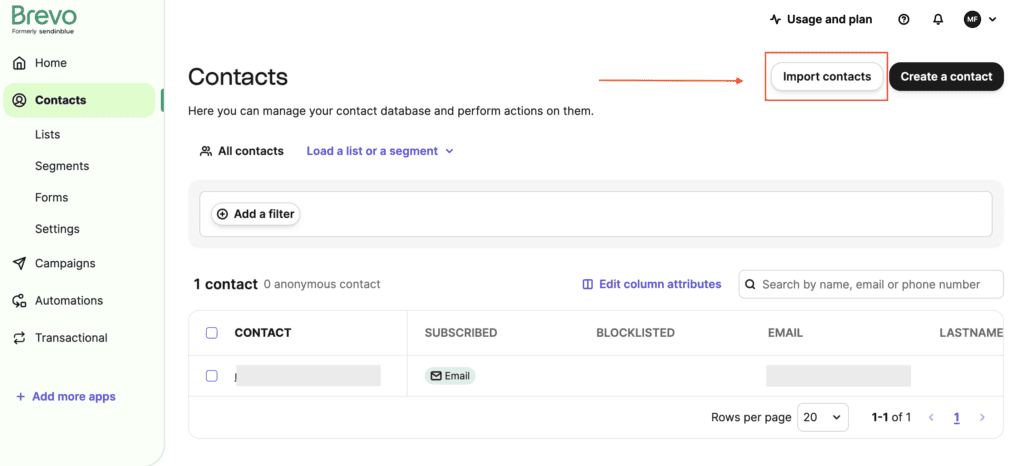
To add a number of contacts at once, you’ll find a light blue button in the top right-hand corner that reads “Import contacts”. Click on it.
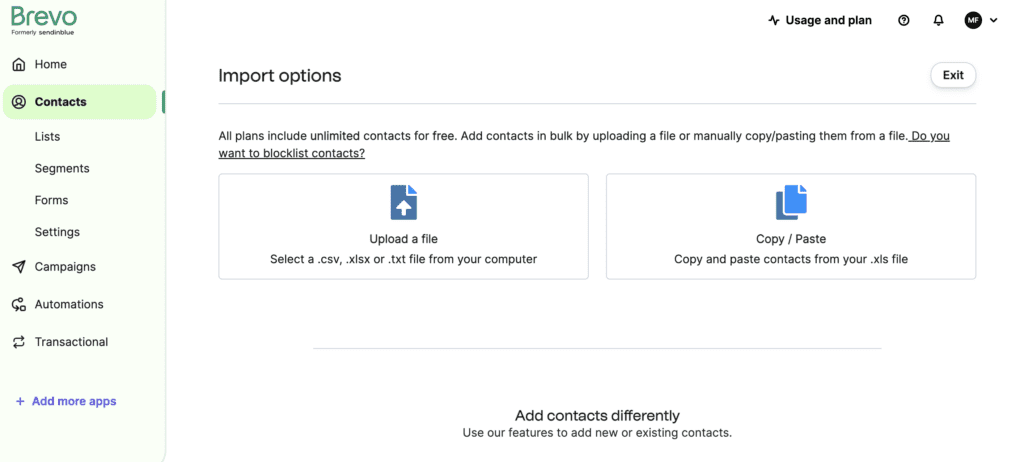
Now, there are a few options for importing existing contacts to your Brevo account:
- Upload a file (.csv, .txt, and .xlsx)
- Copy/paste contacts from an Excel spreadsheet (.xls)
What sets Brevo apart from other email marketing services is that you can store as many contacts as you like for as long as you like. (Even on our free plan).
Create an email list
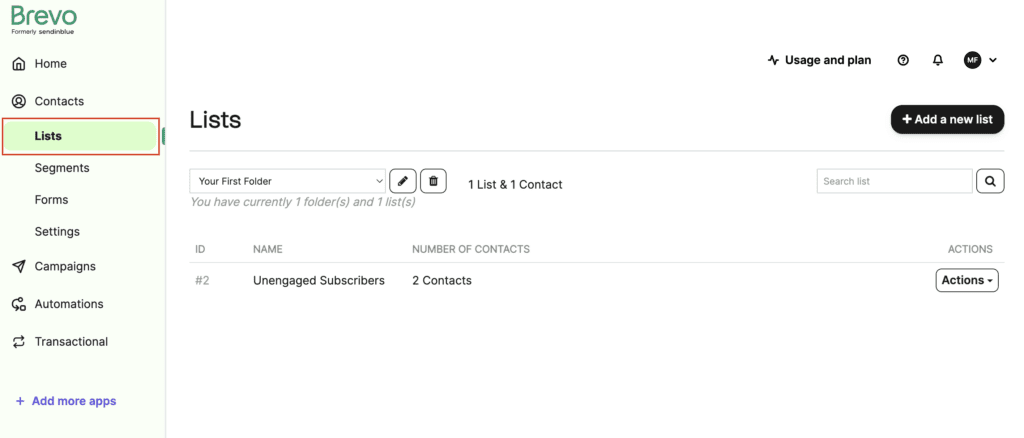
To create and manage your own email lists, start by clicking on “Contacts” in the green left navigation panel once you’re logged into your Brevo account.
Next, click on “lists” in the vertical menu on the left-hand side.
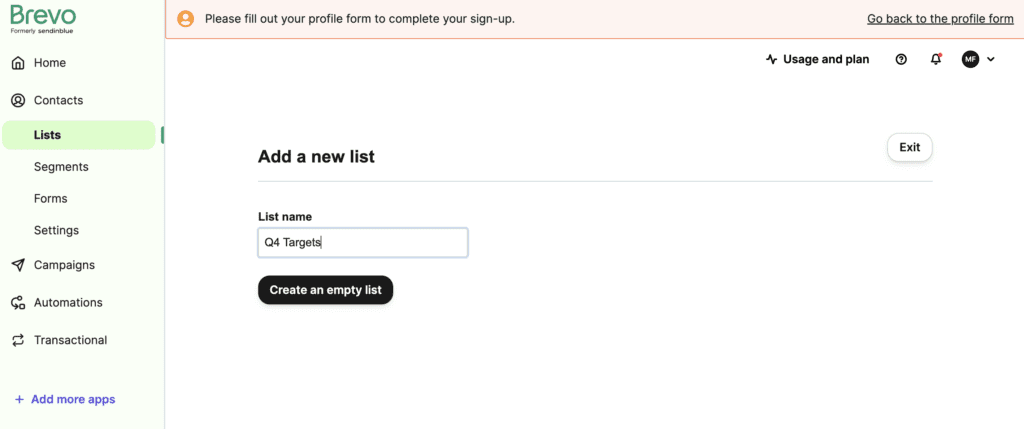
From there, you’re able to add a new list by clicking on the light blue button in the top right-hand corner of the page.
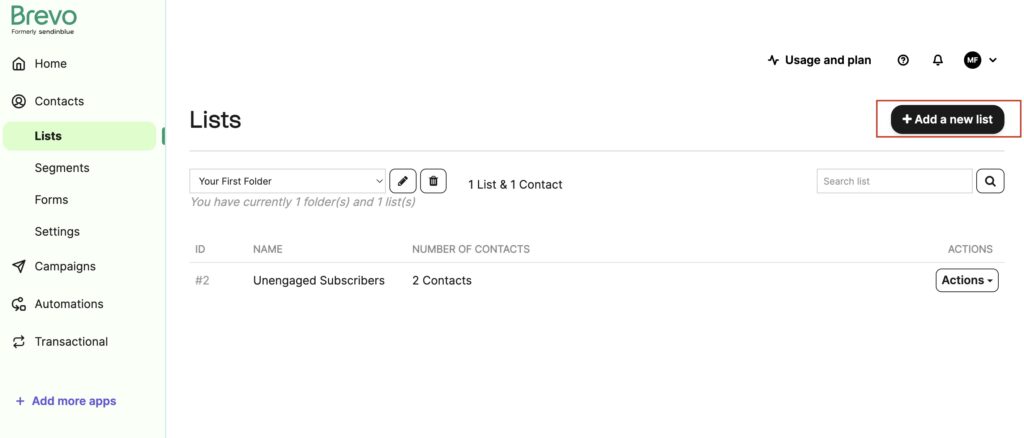
Choose a name, and you’re ready to go!
Create as many lists as you like and manage them for free using Brevo’s advanced segmentation features included on all plans.
To add contacts to your new list, return to the contacts page.
Select the contacts you want to add to your list by ticking the boxes on the left of their email addresses.
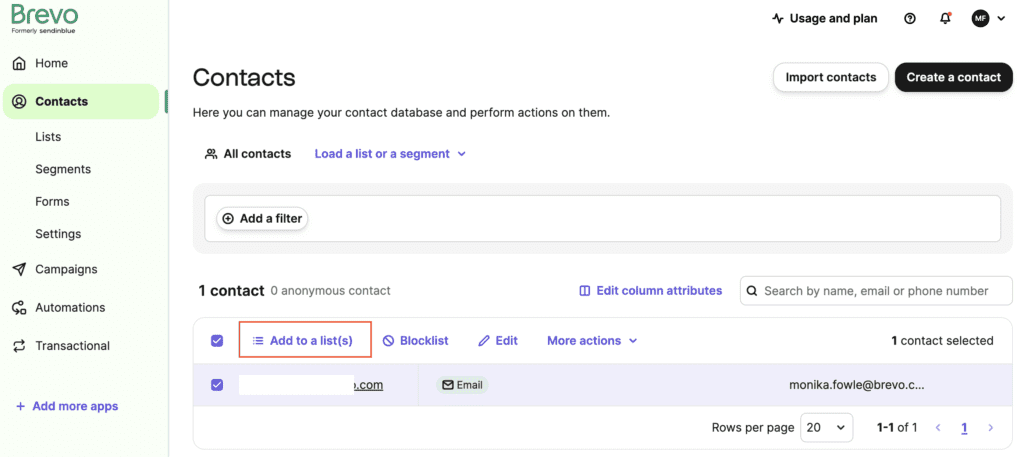
Here, you will see a few options. To add contacts to the list you just created, select your custom list folder and select the list you want to add your contact to.
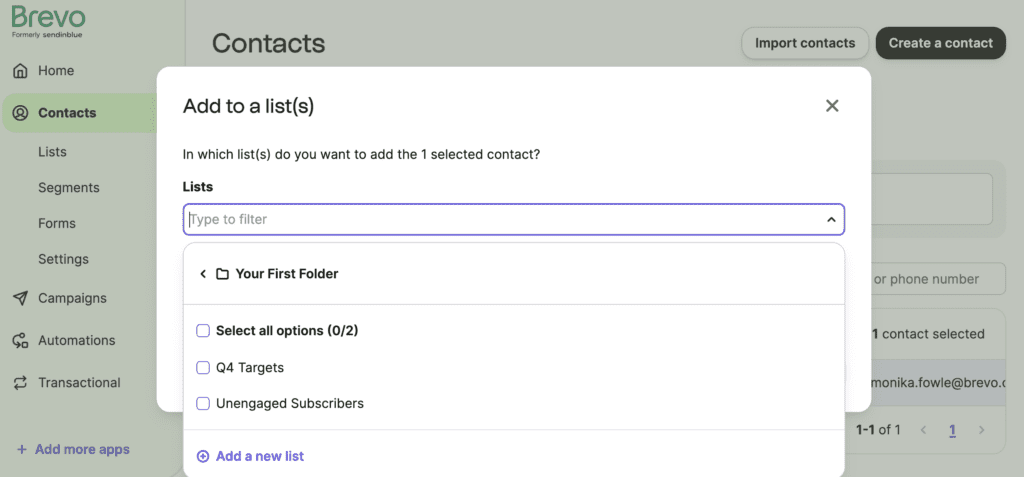
And just like that, you’ve set up your first email list!
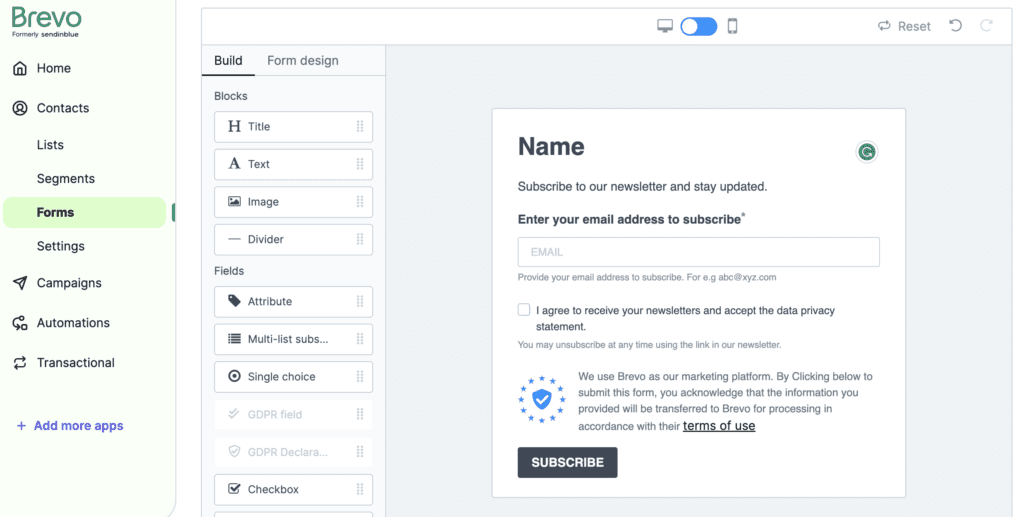
4. Create an email subscription form for your website
One of the easiest ways to grow your contact list is to capture subscribers from your existing website traffic. Take a look at the signup form we use for our Brevo blog newsletter:
To create an email signup form like this, head to the “Contacts” tab on the left navigation dashboard.
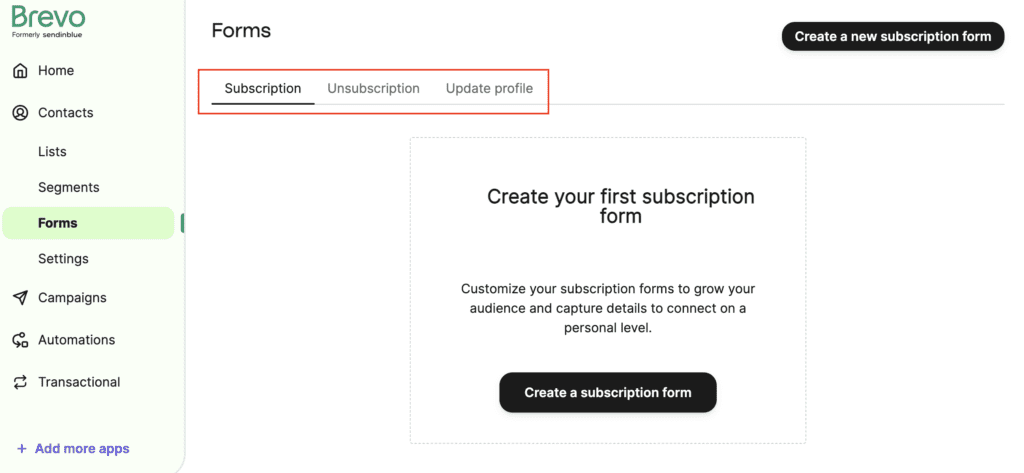
Next, select “Forms” from the menu bar on the left-hand side of the page.
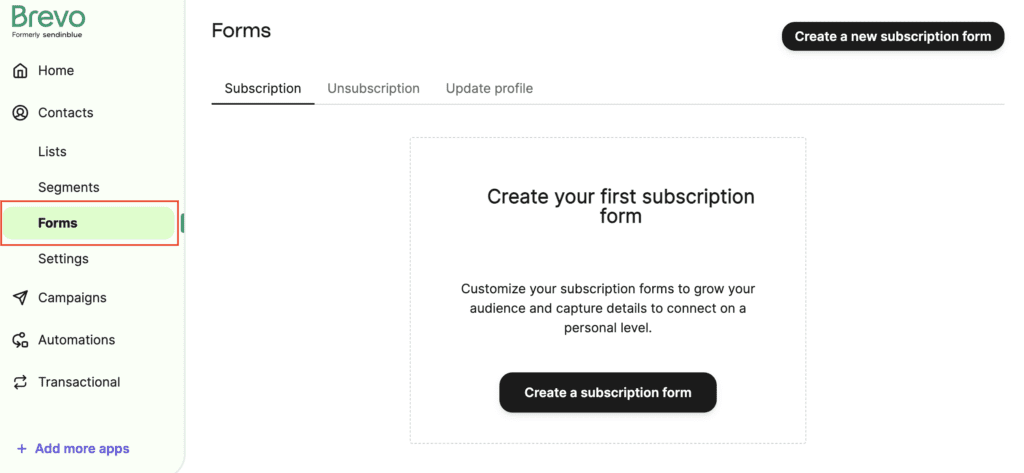
Follow the prompts to select the type of form you’d like to create for your audience. (Subscription, unsubscription, or update of account information).
From there, adjust the form to include whatever fields you need. Then, personalize it with your own branding.
Email subscription form best practices:
Add the subscription form to your website
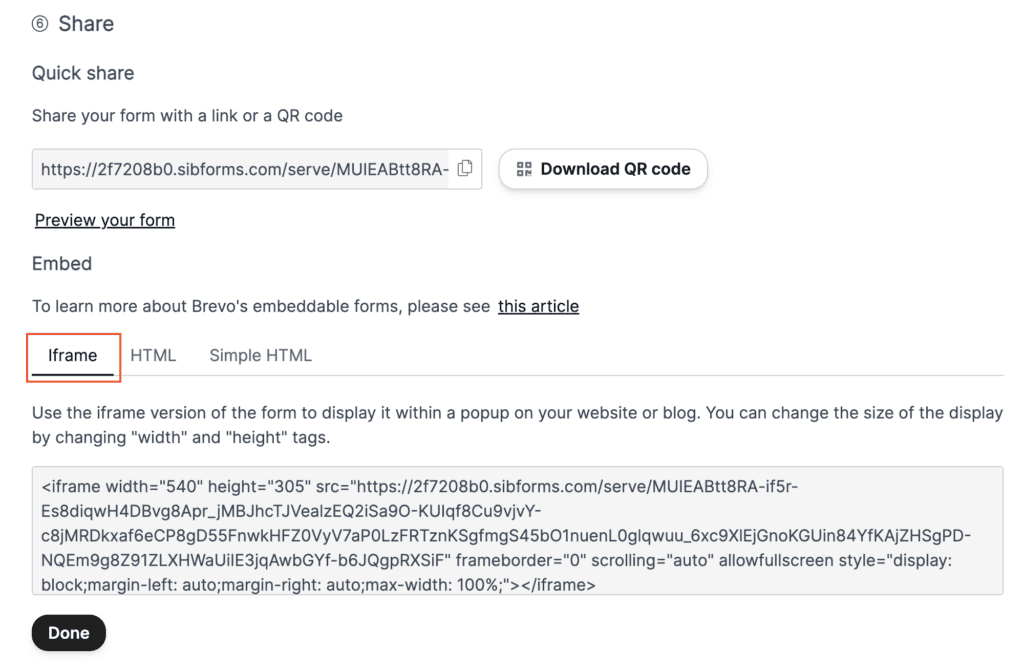
Adding your new subscription form to your website is simple thanks to the editor’s built-in share function.
First, you’ll find a quick share link you can use in emails or on your social media.
Second, you’ve got a few options when it comes to embedding the form on your website. The simplest way is to copy and paste the auto-generated iFrame version of the form into your website editor.
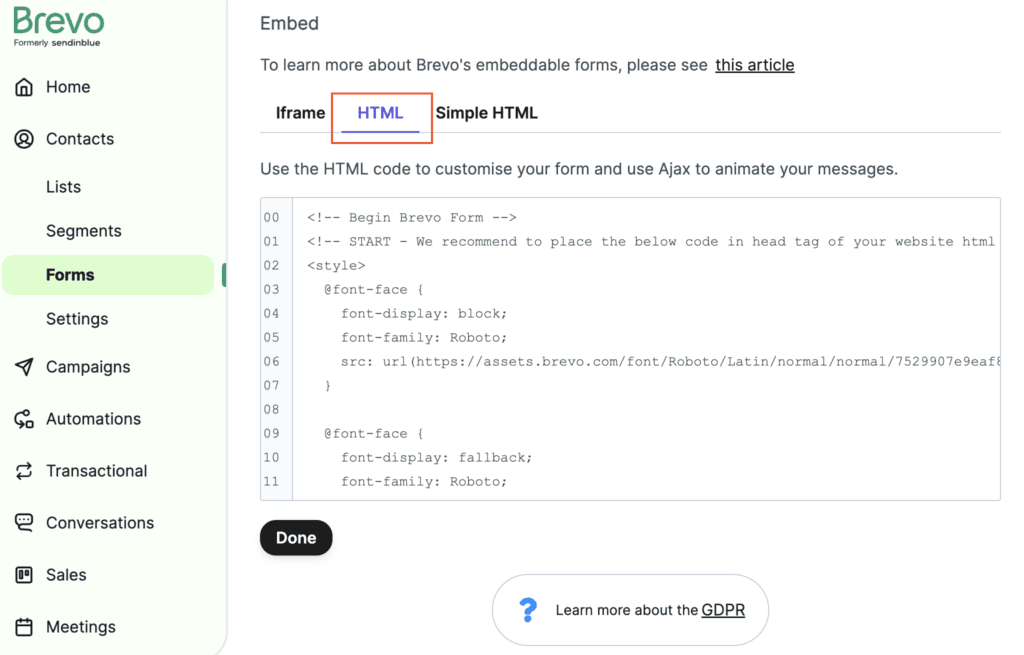
If you want to further customize your form, you can find the HTML versions in the tabs to the right.
5. Attract newsletter subscribers
Now that you’ve designed your newsletter signup form, it’s time to make good use of it!
When deciding where to place your signup forms, it’s important to strike a balance between prioritizing visibility and being mindful of the user experience. Of course, you want as many people to see and use the form as possible. But interrupting potential customers’ website browsing won’t do any favors for your sales.
Features like pop-ups, live chat windows, and lead magnets can do wonders for lead generation and growing your subscriber base. That said, it’s important to be mindful of their placement.
If these features disrupt the browsing experience, they can even hurt your search engine ranking. To avoid this, you should always give your audience a chance to naturally interact with your website before showing them a pop-up, chat box, or lead magnet.
Take a look at this lead magnet we use at Brevo:
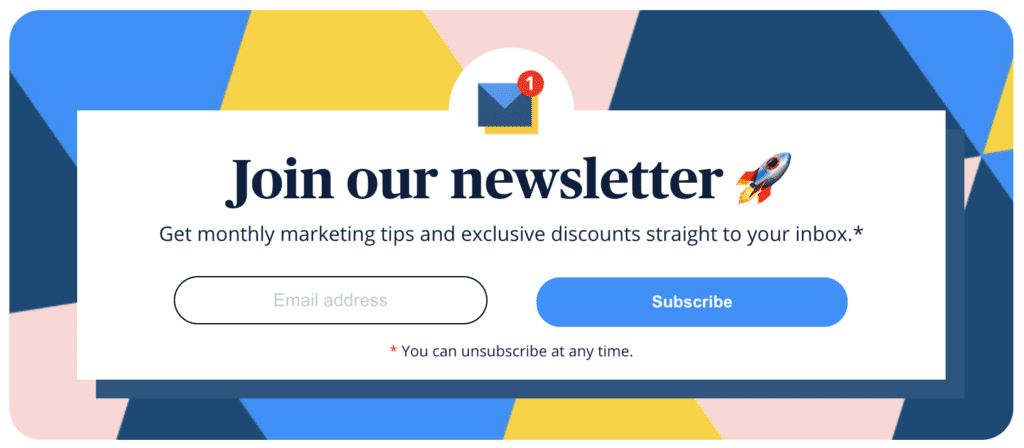
We recommend placing features like this in the blog section of your website. Or whatever part of your website provides your audience with the most value.
If people spend time interacting with your high-quality content, there’s a good chance they’re the same people who would be interested in subscribing to your newsletter.
Speaking of blogs, incorporating relevant CTA buttons in your articles is a great way to guide users through your valuable content. Linking to related pages and encouraging users to sign up for an account goes a long way in terms of building trust between you and your audience. Never underestimate the power of organic growth!
Along the same lines, your social media followers are likely to be interested in your newsletter. Don’t forget to share the form across your Facebook, Instagram, Twitter, and LinkedIn accounts too.
Another practical way to attract newsletter subscribers is just after checkout. If you’re an ecommerce business, try including a signup form after payment. For brick-and-mortar shops, having a clipboard with signups works too. After a while, your list may attract more and more new subscribers thanks to the bandwagon effect.
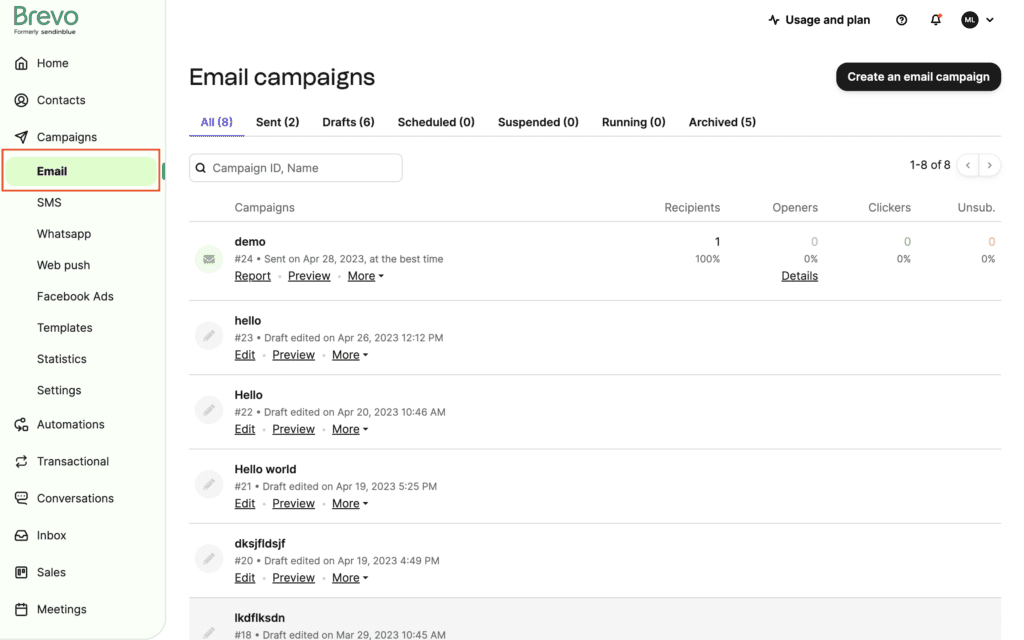
6. Create your first newsletter campaign in Brevo
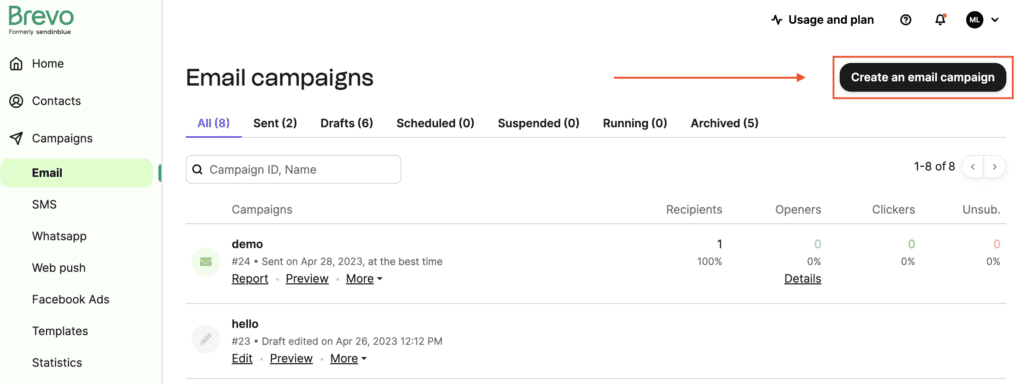
Here are a few tips on how to create a newsletter using the Brevo drag-and-drop editor. Start by clicking on the “email” button on the left-hand side menu.
Next, click “Create a new campaign” button in the top right-hand corner.
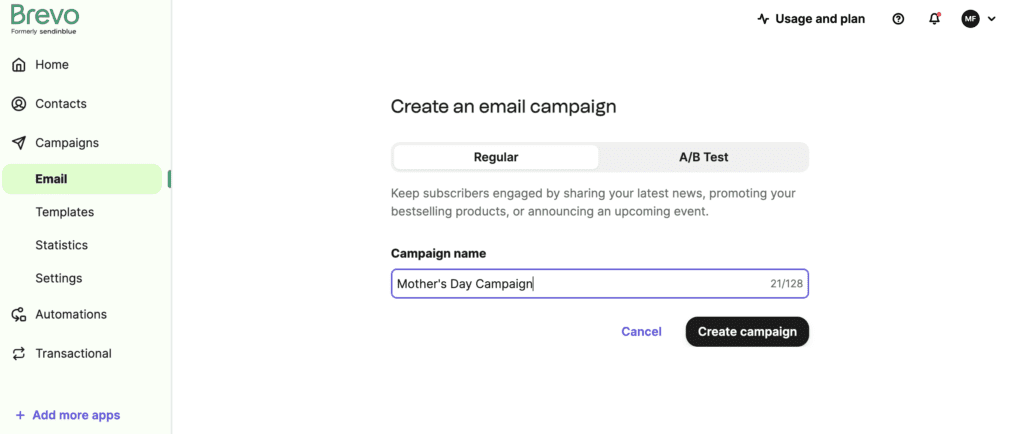
Add the email subject line
From there, you’ll be prompted to fill out details about your campaign. This is where you’ll name your campaign for internal use, then write your subject line and email preview text.
Use AI to write subject lines
Brevo’s AI Assistant knows all the techniques to make your emails stand out in the inbox. Available in our Email editor, learn more here.
Add the sender information
Next, you’ll want to add your sender information. Start by clicking “Edit from”.
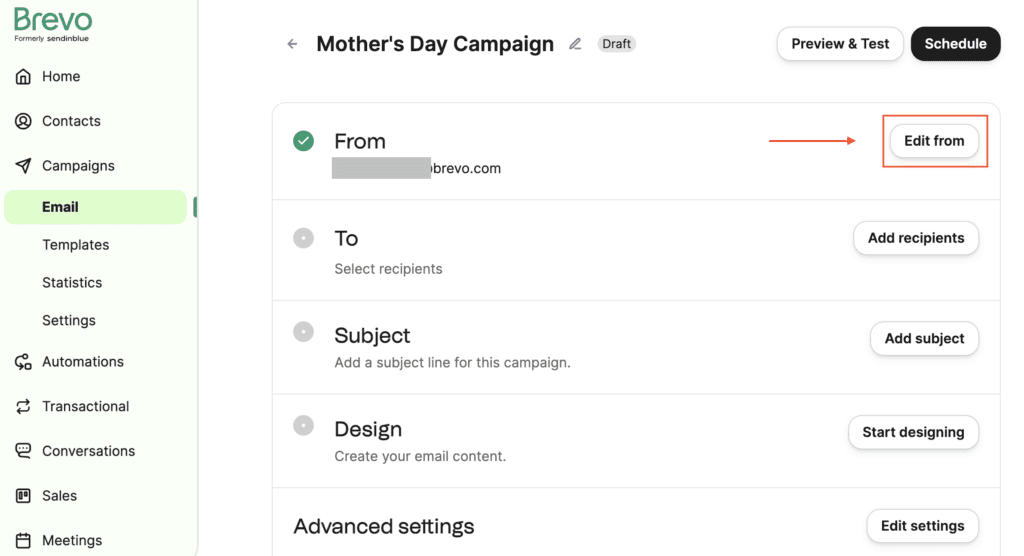
Choose a registered sender on your Brevo account, then write your “Name.” The “Name” is what will be displayed in your email subscribers’ inboxes, so it should be recognizable to your audience.
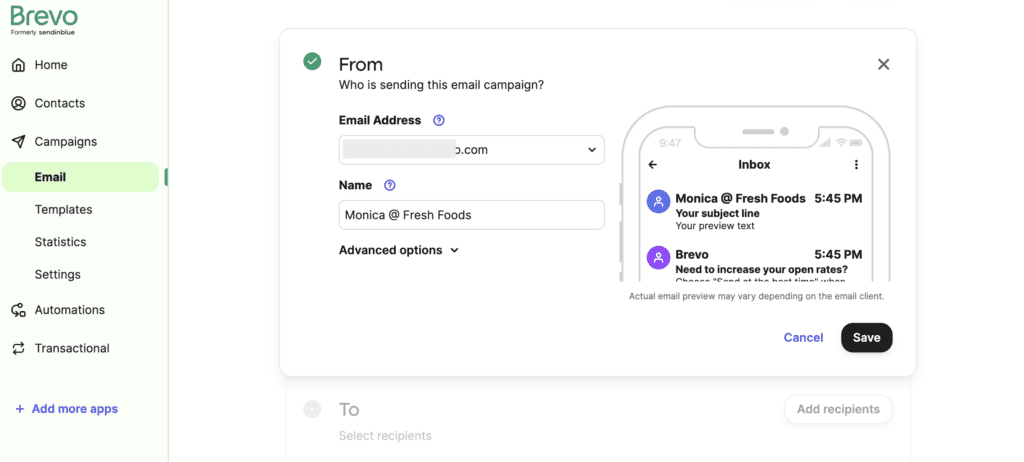
Did you know?
In the advanced settings, you can also customize your greetings, unsubscribe links, and update profile forms. Personalizing your email newsletters in this way helps improve open and click through rates. (All for free).
Design your newsletter
Next comes the fun part — designing your newsletter! With Brevo’s drag-and-drop editor, making eye-catching, professional email campaigns is quick and easy. Select the perfect email template. (Or, design your own). Upload your brand kit. Choose from our selection of stock photos. Then add your newsletter copy. Easy peasy!
If you’re looking for further customization options, Brevo also allows you to code your own newsletters from scratch. For this tutorial, though, we’ll stick to the drag-and-drop editor.
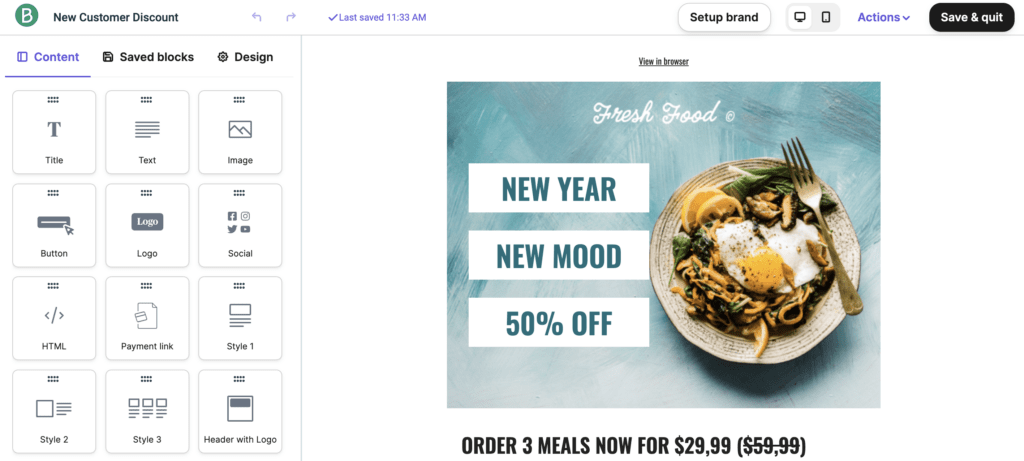
Good to know: All of Brevo’s newsletter templates are fully responsive, meaning they adjust their display across desktop, tablet, and mobile devices. Email design has never been easier!
What to include in your newsletter
Match your newsletter design to your brand identity
Your newsletter design should align with the brand identity you’ve created through your other communication channels. This helps your business come across as reliable, consistent, and credible.
To effectively communicate your brand identity from the get-go, include your logo at the top of the newsletter. (Our default template comes ready with a block just for that).
From there, import your brand kit (fonts, color palettes, etc.) into the editor to make for easy, consistent content creation. Take a look at our newsletter design tips for more!
Want more fonts?
Check out our tutorial on how to import fonts to the drag-and-drop newsletter editor.
Start with the most important information
To help your readers get the most out of your newsletter, try using the “inverted pyramid” structure.
Borrowed from journalism, the inverted pyramid is a writing tactic that means starting with your most newsworthy content and following with supporting details or other information. Given users’ short attention spans, the concept works well in digital spaces too.
When readers open your newsletter, they often don’t have time to read every last detail. That’s why special offers, brand updates, and new product launches should be the first thing you give to your readers.
What’s more, structuring your newsletter this way doesn’t necessarily mean your subscribers will ignore the rest of your content. If anything, you win their extended attention by giving them what they want first. From there, intrigued readers will likely continue on through your email.
Pay special attention to your calls to action
A call to action (CTA) is a button or prompt aimed at getting the reader to perform a specific action (clicking through to an article, visiting your site to make a purchase, etc.)
Calls to action are responsible for driving traffic to your site, generating sales, and bolstering your social media following. They’re one of the most important aspects of any marketing campaign, so be sure to optimize them when creating a newsletter.
How to make a newsletter CTA button that converts:
- Choose a color that stands out from the rest of the newsletter.
- Use action words that encourage readers to do something.
- Place it strategically — the CTA should be visible to readers but not overly disruptive to the user experience.
CTA links are most effective when targeting a specific landing page, blog post, or discount offer. Making a CTA that sends readers to your homepage won’t do much for conversions. Your logo is a great place to link to your homepage, but save your CTAs for targeted click-throughs.
And make sure you let readers know where they’re headed by labeling the CTA with actionable phrases like, “shop our spring/summer collection” or “sign up for our newsletter.”
Check out our post on email call to action best practices to learn more!
Hesitating between different CTAs?
Try A/B testing to determine which one works best for your contacts.
Link to your social media profiles
Your newsletter isn’t just an email. Think of it as part of your overall digital marketing strategy. It’s the perfect place to link your other digital marketing channels, particularly social media.
Building a loyal and engaged audience across channels means linking between those channels.
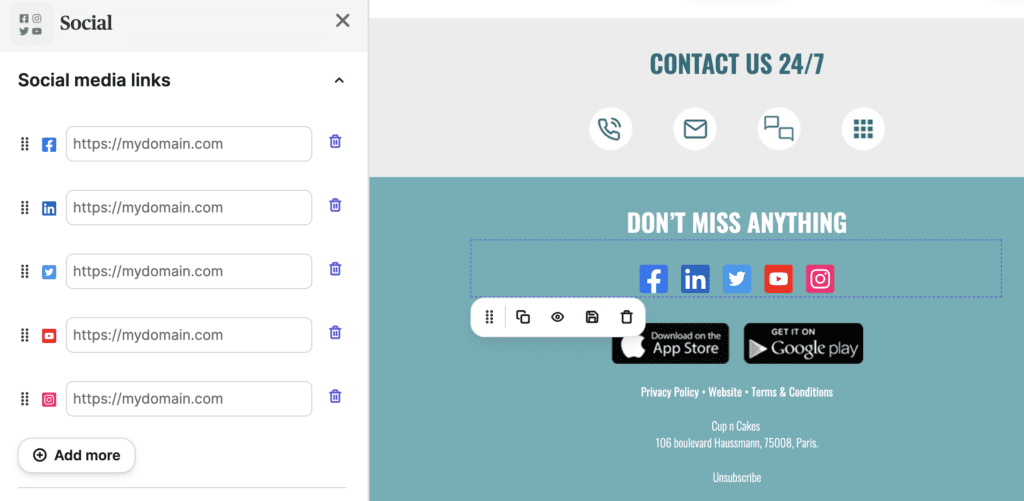
To maximize your social media presence, include CTAs linking to your various platforms. In Brevo’s editor, it’s easy to do. Select the “social” tab from the left-hand side menu.
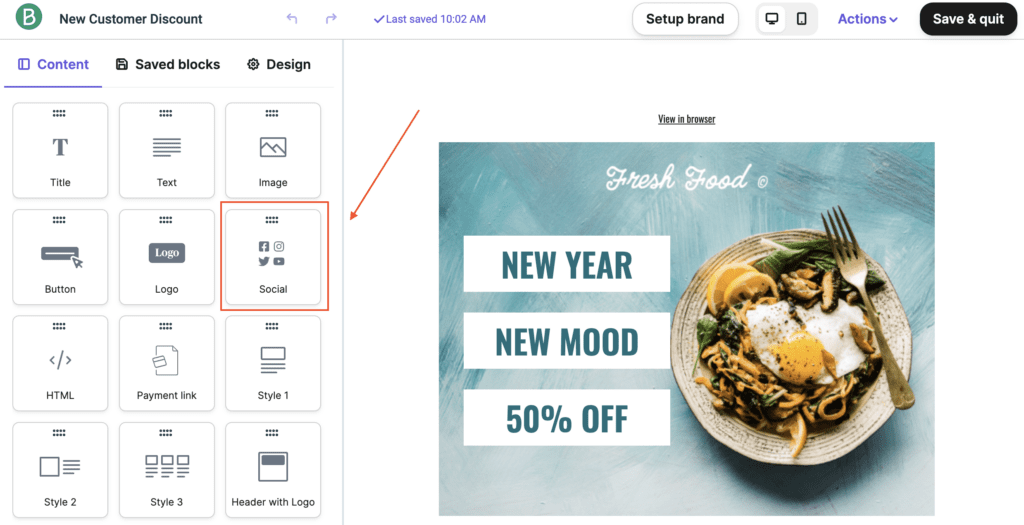
Then, choose whichever social media you want to include. (There are ready-made CTA buttons for dozens of social media platforms available). Simply add the links to the fields on the left-hand side menu and you’re all set!
Looking for more inspiration?
Check out these 9 stellar email newsletter examples and 40+ email newsletter templates on Brevo.
Once you’re happy with your newsletter design, click the blue “continue” button in the top right-hand corner of the page.
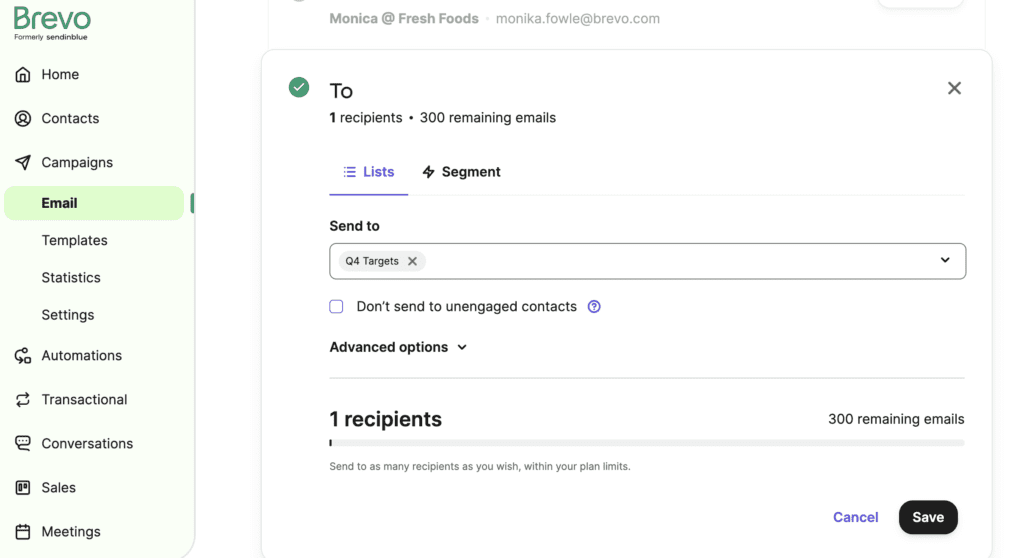
Choose your contacts lists
The next step is deciding which lists you want to target with your campaign.
You can also narrow down your recipients by selecting “don’t send to unengaged contacts” or by applying customized filters like you see below. Both these features help improve email deliverability and connect with your subscribers in a more targeted way.
7. Preview and send a test email
You should always test your campaign before you email clients and contacts! Doing so will help you catch any issues before the email lands in inboxes. (And be sure to test both on desktop and mobile devices).
To test your campaign, click on “Preview and test” from your email campaign fields overview.
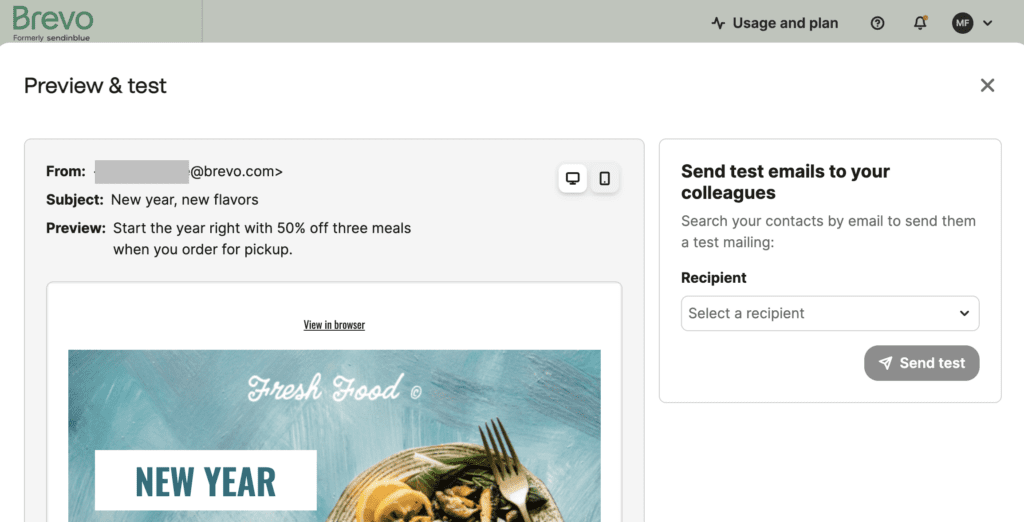
Next enter your or your marketing team’s email address and click “Send test.”
Once your campaign arrives in your inbox, check to see that all your features display properly and that there aren’t any typos. Be sure to check on mobile devices too.
8. Send your newsletter
The final step before your newsletter reaches your audience is to schedule your campaign. Start by clicking on the blue “schedule” button in the top right-hand side of the page.
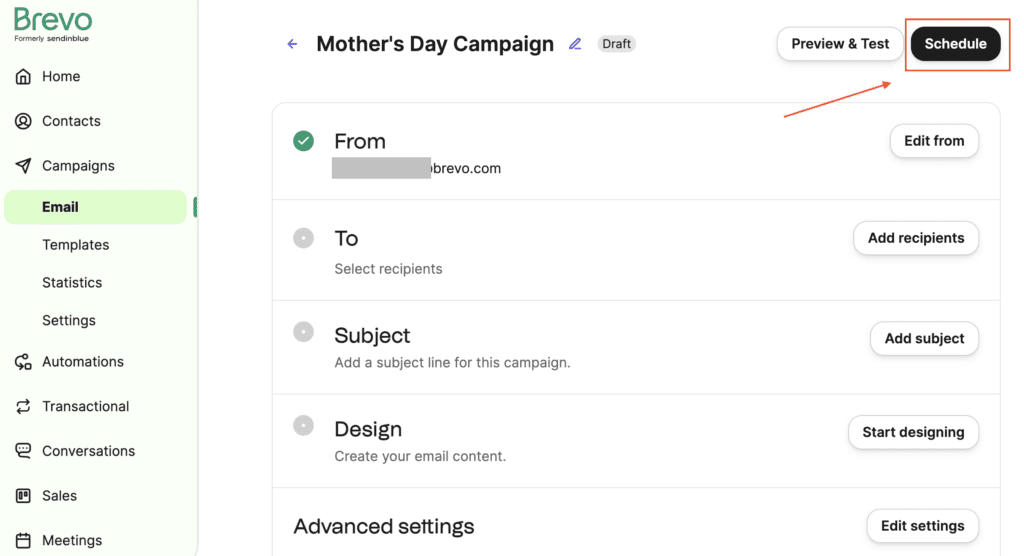
Next, you’ll be prompted to select a send time. You can send your campaign immediately, or select a specific date and time.
Or you can use Brevo’s Send Time Optimization feature. This uses data from your previous campaigns to determine the best send time for each of your contacts. This means that not all your subscribers will receive the email at the same, but typically leads to higher open rates.
Learn more about the best time to send an email!

9. Track newsletter performance
Congrats! This is how to successfully create a newsletter with Brevo. Your work’s not over yet, though…
Reviewing your newsletter performance is an essential part of an effective email marketing strategy. Metrics like open rate, click-through rate, unsubscribe rate, and bounce rate are absolutely necessary to track.
- Open rate: Your email open rate tells you the percentage of total recipients who opened your campaign. For example, if 100 contacts receive your email but only 50 open it then your open rate is 50%.
- Click-through rate: The click-through rate represents the percentage of recipients who clicked a link in your email but only for those who opened it. For example, if you send an email to 100 contacts, 50 of them open it, and 25 of these openers click a link, your click-through rate is 50%.
- Unsubscribe rate: The unsubscribe rate tells you the percentage of recipients who clicked to unsubscribe from your emails in a campaign. For example, if 100 contacts receive your email and 5 of them choose to opt-out from future emails, your unsubscribe rate is 5%.
- Bounce rate: The bounce rate refers to the percentage of emails that fail to deliver because they were returned by the recipient’s server. For example, if out of 1,000 emails 5 bounce then the bounce rate is 0.5%.
- Soft bounces: The email temporarily fails to deliver because the recipient’s server is down or their mailbox is full.
- Hard bounces: The email will never be delivered. (Email address is incorrect or no longer exists.)
Keeping track of your email marketing metrics helps for a few reasons. First, it can signal technical issues in your campaign. Further, it shows you what type of content, frequency, and timing work for your audience. Altogether, your campaign metrics help you work toward continuous improvement within your overall marketing strategy and sending the best email newsletter possible.
Confident on how to create your first newsletter?
And there you have it, folks — how to create your very own email newsletter!
Newsletters are an excellent way to engage with your clients, expand your brand’s reach, and increase sales. Without a doubt, they are an essential part of any effective marketing strategy.
Why not try your hand at your own newsletter? Create a free Brevo account and get started creating your newsletter today!
Jumpstart your newsletter strategy with BrevoFree plan includes access to all core email features, 300 emails/day, 40+ email templates, and customizable signup forms to grow your email list. |